How to Sharpen Kitchen Knives at Home: A Step-by-Step Guide
By the QuiteRecipes team (Jamy & Kaïna)
Most 'dull' knives aren't dead — they just need aligning. Here's when to steel, when to sharpen, and the exact angles that bring any blade back to slicing perfection.
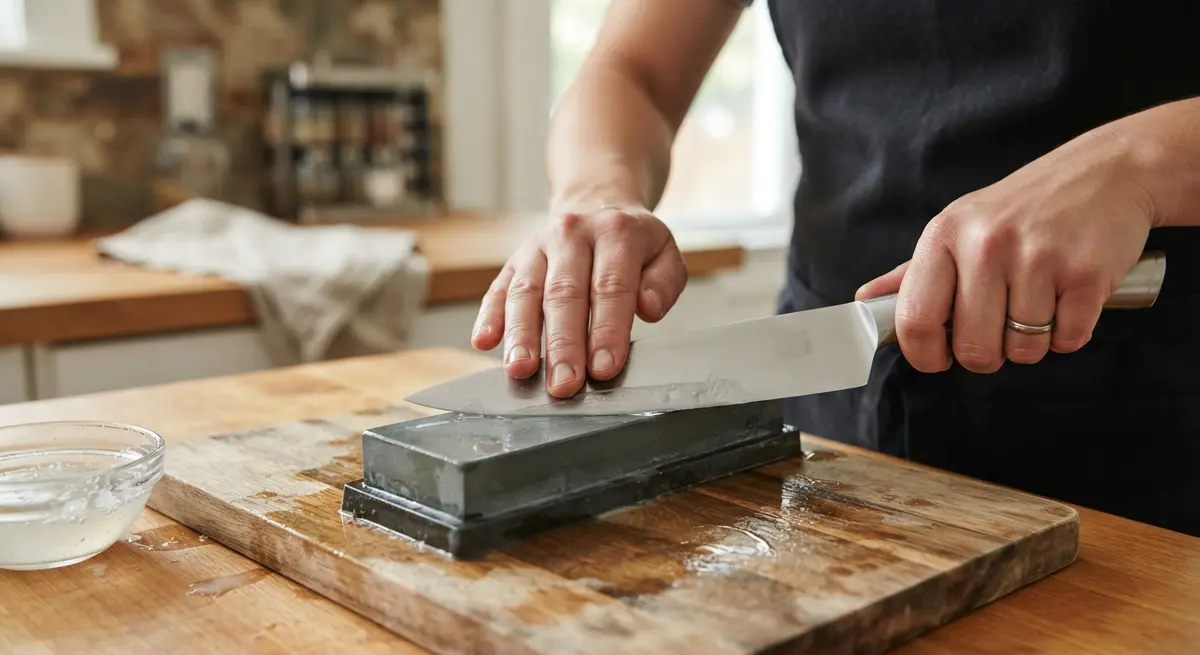
I'll never forget the first time someone sharpened my knife in front of me. I'd been living with a "sort of okay" knife for years, blaming my cutting board and my ingredients for why everything looked bruised when I chopped it. Twenty minutes on a whetstone later, it sliced through a ripe tomato like it wasn't there — clean, straight, no squish. I almost cried. If your knife has ever made you think "I'm just not good at chopping," the odds are high that the problem is your edge, not your hands.
Here's the good news: sharpening at home is a completely learnable skill, not a black art. With a modest stone, twenty minutes, and the steps below, you can bring any blade back to slicing perfection and keep it there for years. Let me walk you through the whole process — including when not to sharpen, because half the battle is knowing what your knife actually needs.
Sharpening vs. Honing: They're Not the Same Thing
This is the biggest confusion in home kitchens, and it decides whether you waste money or fix the real problem.
- Honing (using a steel): realigns the microscopic edge of a blade that has curled slightly during use. It removes no metal at all. Think of it as straightening a bent wire fence post — the edge is still sharp; it's just folded over. Do this every few uses; it's what keeps a good knife feeling sharp most of the time.
- Sharpening (using a stone or sharpener): removes tiny amounts of metal to grind a brand-new edge. You only need this when honing stops working — every few months for a typical home cook.
The practical test: can you slice a ripe tomato without pressure? If yes, your knife is fine — steel it and move on. If no, you don't necessarily need sharpening; try honing first. And if it fails a tomato after a good honing, then it needs actual sharpening.
Before You Start: Gather the Tools
You don't need a professional kit to get professional results. Here's everything I actually reach for:
- A whetstone (the classic, and my recommendation). A two-sided combination stone — 1000 grit on one side, 3000-6000 on the other — is all a home cook will ever need. Expect to pay $20-40 for a good one; it'll outlast you.
- A honing steel or ceramic rod for regular maintenance — usually under $25.
- A damp towel tucked under the stone so it doesn't slide across your counter.
- A cup of water to keep the stone wet as you work.
Most stones are "soaking stones" — check the instructions, since many need 5-15 minutes in water before use, and they must stay wet while you work. The water carries away tiny metal filings and keeps the stone cutting smoothly instead of glazing over. There are splash-and-go stones that skip the soak; either is fine.
The Angle Is the Most Important Thing
Sharpening can be summarized as: hold the blade at a consistent angle, drag it across the stone, repeat. The angle defines the character of the edge.
- Most Western-style kitchen knives (German brands like Wüsthof and Henckels) sharpen best at around 20 degrees per side. This makes a sturdy, forgiving edge — the workhorse default.
- Most Japanese knives (Gyuto, Santoku) prefer a thinner 15 degrees, which gives a razor-sharp slice at the cost of some durability.
- If you don't know your knife, 20 degrees is the safe, home-cook default. It absorbs the instant that makes it harder to chip.
How to find the angle without a guide: hold the knife edge against the stone and stand it slightly upright. A 20-degree angle feels roughly like the amount you'd set a phone in its kickstand, or the space a thin dime occupies under the spine. Consistent angle matters more than perfect angle — keep it steady across every pass.
Sharpening on a Whetstone, Step by Step
Here's the sequence I use, refined over years and a lot of knives:
- Soak the stone per its instructions, then set it on the damp towel with the coarse (1000 grit) side up.
- Hold the knife at your chosen angle (20 degrees), edge away from you, spine toward you, with your dominant hand on the handle and your other hand flat across the blade for even pressure.
- Push the blade across the stone in a sweeping motion, from the base of the blade toward the tip, as if you're slicing a thin layer off the stone. Use the full length of the stone; a consistent sweep keeps the edge uniform.
- Repeat 10-15 passes on one side, then flip and do the same on the other side. Always keep passes equal per side, and alternate sides as you go to keep the edge centered.
- Check for a burr. After a handful of passes, barely and very carefully drag a fingertip crosswise along the edge opposite to the side you just ground. A faint roughness tells you a burr has formed — proof you've ground a fresh edge on that side.
- Flip to the finer side (3000-6000 grit) and repeat 10-15 passes per side to polish and remove the burr. This is where the edge goes from sharp to sharp.
- Rinse and dry the knife, then give it a quick honing pass on the steel to finish aligning the edge.
When you're done, the knife should pass the paper test: hold a sheet of paper vertically and slice downward; the blade should cut through cleanly with just the weight of the knife, no sawing motion. If it catches or tears, do a few more passes.
The burr is your progress meter. You can't see a sharpening edge by looking at it, so the burr — a tiny curl of metal on the back edge — is your honest report that the work is happening. Feel for it patiently and lightly.
Stone Types: Waterstone, Oilstone, or Diamond Plate?
The word "whetstone" covers a few families, and it helps to know which you're buying:
- Waterstones are the modern standard for kitchen use — they cut fast, come in high grits, and need a soak. My recommendation for most home cooks.
- Oilstones are the older workhorse — they use mineral oil instead of water, they don't soak, and they last forever, but they're slower cutting.
- Diamond plates are fast, flat, and never absorb water — great for maintenance and for flattening stones, but they're aggressive and pricier.
Whichever you pick, own one combination stone and use it. A 1000/6000 combo is genuinely all you need; spending more on gear buys marginal gains, not better edges.
The Honing Steel: Your Weekly Friend
A steel doesn't give you a new edge — it keeps the good edge you have. Once or twice a week (or every few uses), run the blade along the steel at the same angle, tip-to-heel, light pressure, 5-10 strokes per side. This straightens the micro-curl that naturally forms during chopping, and it takes about thirty seconds.
The most common error with the steel is wild, varied angles. Hold the rod firmly and maintain the same angle on every pass; consistent light pressure beats frantic swiping. A modern steel only ever touches the edge lightly — the heavy-duty "chef film" days of hard clanging are gone.
Pull-Through Sharpeners: The Honest Assessment
Pull-through sharpeners are cheap, fast, and genuinely better than nothing. If a dull knife is your only problem and you don't want to own a whetstone, a decent pull-through will restore a working edge in about a minute. The catches are real: the cheap $2 supermarket versions use a coarse carbide edge that scrapes metal off violently and shortens the blade's life, and set-angle devices lock you into one angle that may not match your knife. For high-end Japanese steel, I would never use a pull-through.
My honest ranking: whetstone (best control and edges), then a quality ceramic pull-through (fine for everyday use), then the cheap carbide junk (better than a dull knife, worse than anything else). If you're buying your first sharpening tool and you cook more than once a week, buy the stone.
Stropping: The Optional Polish
For a home kitchen, stropping is optional, but it's a beautiful finishing habit when you want your edge to feel like a new blade. After sharpening, pass the blade along a leather strop — or even the leg of your jeans, a piece of cardboard, or a plain wooden board — a few times per side at the same angle, with light pressure. This removes the microscopic wire-edge residue a stone leaves behind and realigns the very tip. It takes twenty seconds and it's the difference between "sharp" and "fine-dining sharp."
Five Mistakes That Ruin Edges
Even a great sharpening session can't save a knife from the daily abuse that dulls it. Watch out for these:
- Dragging the edge across glass or stone cutting boards — the fastest way to chip a blade. Use wood, bamboo, or soft plastic boards.
- The dishwasher. Heat, detergent, and rattling add up to chipped edges and rusted steel. Hand wash your good knives and dry them immediately.
- Scraping food off the board with the edge. Use the spine (the dull back) or a board scraper instead — the edge is for cutting, not shoveling.
- Chopping on one spot of the board. Keep the knife moving; a single hot spot wears out its section of edge faster than the rest.
- Skipping the steel until the knife is fully dull. By then the edge has rounded over, and you've graduated from maintenance to a full sharpening session you could have delayed by months.
When to Sharpen vs. Hire It Done
For a home cook, a full sharpening every 2-3 months on a two-sided stone is plenty. Your steel does the weekly work in between. If your knife has visible chips, a bent tip, or you inherited an heirloom you don't want to risk, pay a professional once a year — pro edges are excellent, and maintaining them at home with weekly steeling is genuinely achievable. Fix chips proactively instead of sharpening over them; sharpening never repairs damage, it just reshapes around it.
Sharpen, Taste the Difference
Here's the part nobody warns you about: a sharp knife changes flavor. Clean slices keep cell structure intact, so herbs stay green, tomatoes stay juicy, and onions taste sweet instead of bruised and bitter. A bruised cut from a dull blade starts oxidizing the moment it happens — that's the gray, weepy, bitter edge on your onion slices.
Take this weekend to sharpen your knife properly. Then do the two-half-onion test: chop one half with the old edge (before you fix it) and one with the new, and taste both. The difference will make you a believer — and that's the moment knife skills become effortless, because a sharp blade does half the work for you.
FAQ
How often should I sharpen my kitchen knives?
For a home cook, every 2-3 months with a whetstone. Hone weekly in between. Heavy daily use, or restaurant-level cutting, pulls that down to monthly.
Do I need to soak my whetstone?
If it's a soaking stone, yes — usually 5-15 minutes before use, and it must stay wet while you work. Splash-and-go stones need only a spray of water.
Why is my knife still dull after sharpening?
Either the burr wasn't removed (finish on a finer grit, then strop), the angles were inconsistent, or you stopped too early on a very worn edge. Go back, stay consistent, and finish with a burst of fine passes.
Is a knife sharpener worth buying?
A pull-through sharpener is fine for everyday knives; a good combi-whetstone (1000/6000) is worth it for anyone who cooks regularly. Cheapest of all: learn to hone well and you'll sharpen far less.
Does honing really do anything, or is it theater?
It genuinely does. A steel straightens the microscopic fold in the edge that chopping creates, restoring "sharp" without removing metal. It's the single most cost-effective kitchen habit.
Key Takeaways
- Hone weekly with a steel; sharpen every 2-3 months with a stone.
- A 1000/6000 combi-whetstone covers every home-cooking need for $20-40.
- 20 degrees for Western knives, 15 degrees for Japanese; consistency beats precision.
- The burr is your progress report — feel for it, then polish it away.
- Protect your edge: never glass boards, never the dishwasher, never scrape with the blade.
Go Sharpen Something
Your knife has been asking for this for months. Grab a tomato, a paper towel, and twenty minutes this weekend — stone the blade, hone it clean, and do the taste test. The kitchen that felt like friction will feel like flow. That's the whole game, and it starts with one sharp edge.
Published on 2026-08-13 by the QuiteRecipes team (Jamy & Kaïna).
Related Articles
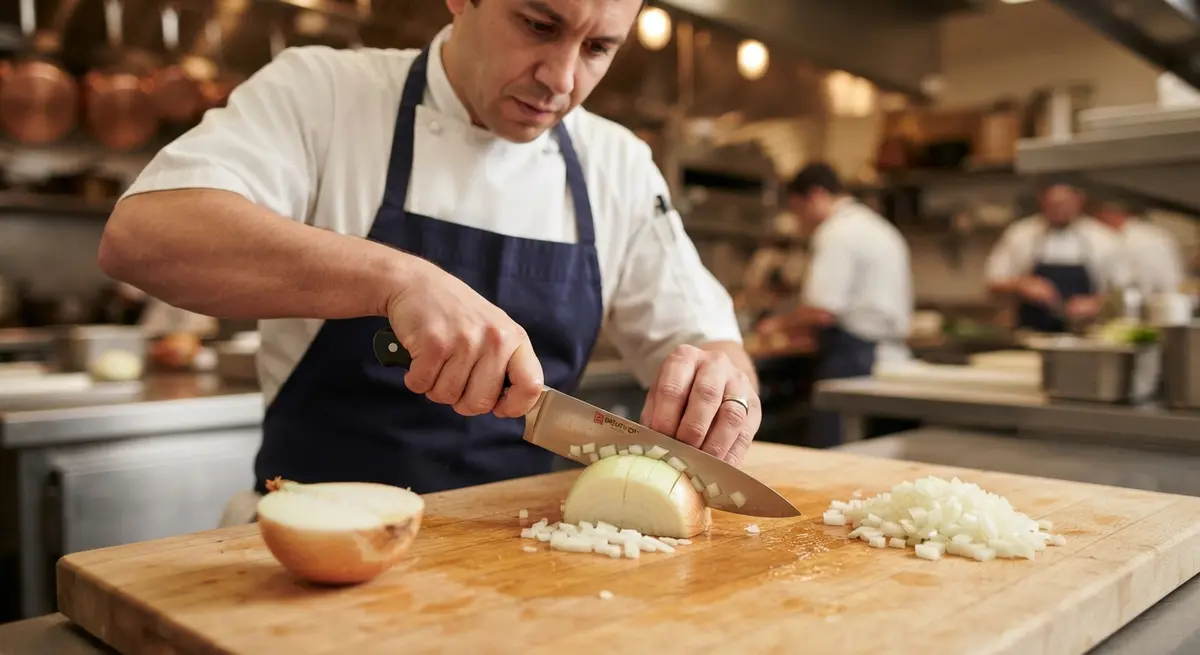
How to Dice an Onion Like a Pro (Without Shedding a Single Tear)
Uniform onion dice aren't just prettier — they cook evenly, which means better flavor. Learn the claw grip, the horizontal cuts, and the fridge trick that stops the tears before they start.

How to Plate Like a Restaurant Chef
The food is good already — the plate is what makes it memorable. A few simple principles of composition turn any dinner into something that looks like it costs money.
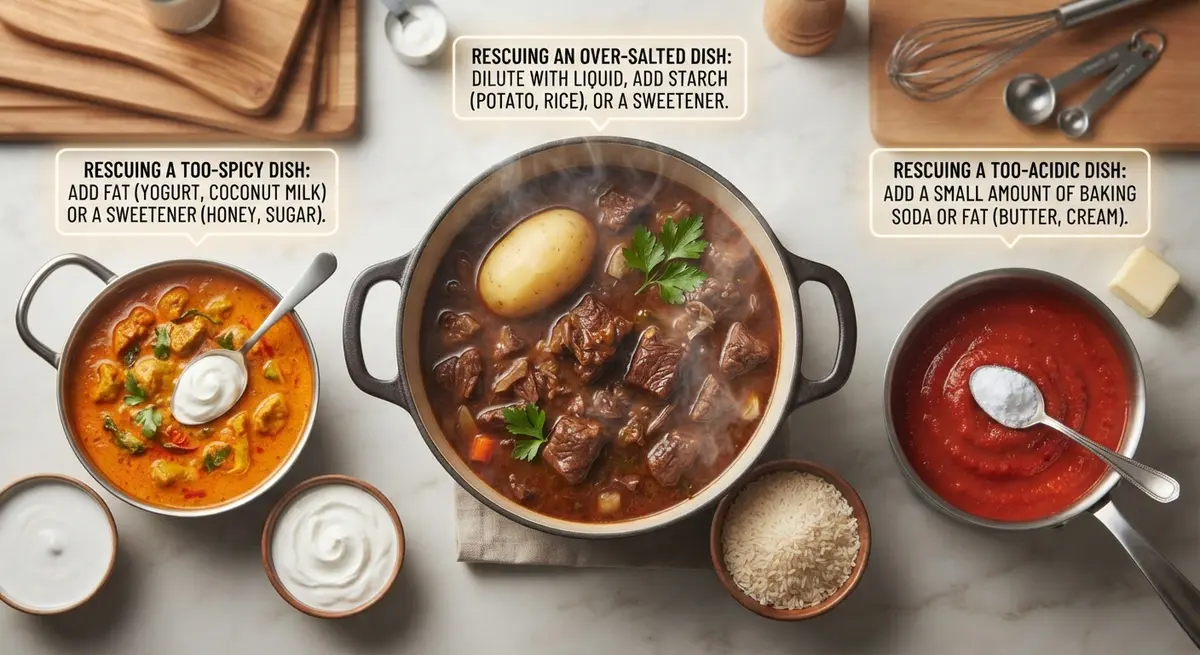
How to Rescue an Over-Salted, Too-Spicy, or Too-Acidic Dish
Every cook has ruined a pot. The good news is that overseasoned food is usually fixable — the trick is knowing which rescue matches the problem.
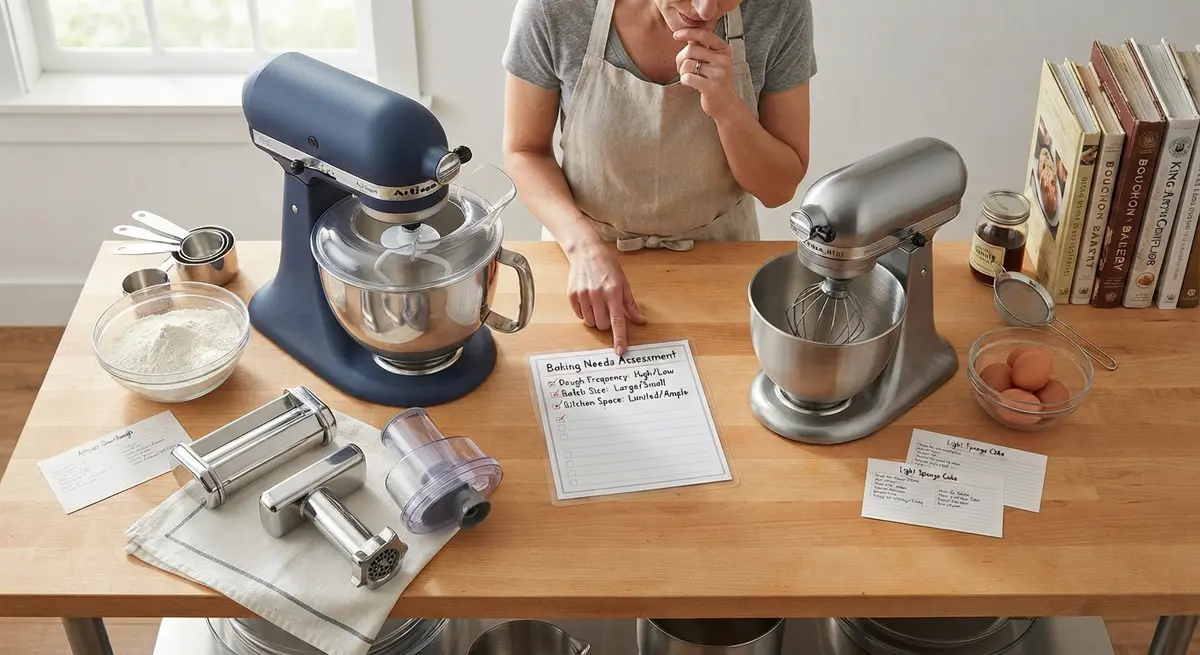
How to Choose the Right Stand Mixer for Your Baking Needs
The right stand mixer survives decades of baking — the wrong one collects dust. This guide cuts through the specs: capacity, bowl, power, attachments, and the decision rule for your kitchen.
About the Authors
This recipe and guide was developed, tested, and approved in our home kitchen and daily life. Jamy is a retired Food Service District Manager and Early Childhood Program Manager who spent his career overseeing multi-site restaurant operations, large-scale culinary production, and daycare menu management. Kaïna brings the ultimate real-world test: making sure it brings ease and joy to our kids on a busy weeknight.
Read more about our professional background and philosophy →